
Why Did My Candle Sink in the Middle?

The answer to why did my candle sink in the middle is that wax shrinks as it cools, leaving a depression called a sink hole. Wax at the container edge cools faster than wax in the center, creating uneven cooling as the candle sets.
Sink-hole prevention starts with warming the container and encouraging more even cooling. Candle Culture gives pouring guidance for the specific paraffin-soy blend it discusses. Repair involves checking for hidden pockets beneath the surface, then melting or filling the depression until the wax is level.
Did the Depression Appear During Cooling or Burning?
A depression that appears while a newly poured candle cools is a sink hole; a narrow hollow that develops around the flame during burning is tunneling. Timing separates a wax-setting problem from a wick-sizing problem, so the appropriate correction starts with when the dip appeared.
Wax shrinks faster along the container’s edge than at its center during cooling, setting up a central depression as the candle sets. Sink holes also occur in professionally made candles, so post-pour depressions are not limited to candles made by beginners.
Tunneling develops when a wick is too small for the candle, creating a small melt pool and leaving high wax walls around the flame. Limited wax burn-through produces that hollow during use, rather than during setting. Correcting the wick size addresses this cause of a candle burning unevenly.
A slanted candle top points to a different set of checks: an undersized wick or excessive dye clogging the wick. For this uneven-burn pattern, use a properly sized wick, avoid excessive dye, and check for water in the wax. Dye-related clogging adds a mixing consideration to the wick-size check.
Smoke accompanying an uneven burn calls for checking wick thickness and length, rather than assuming the wick needs to be larger. An oversized or overlong wick is associated with smoking during burning. Try a thinner wick or trim the wick to about half a centimeter, following Cosy Owl’s guidance.
Small air bubbles have another cause: rushed pouring or vigorous stirring of dye and fragrance traps air in the wax. Pour slowly, stir without vigorous agitation, and gently tap the container after pouring to help release bubbles. A hair dryer applied to a semi-cooled candle also encourages trapped bubbles to rise.
Wax pulling away from the container with a large air bubble calls for checking wick sizing and water contamination. Improper wick size or water in the wax causes this separation, rather than the small bubbles introduced through vigorous mixing. Check those conditions when the visible problem includes a gap against the container wall.
Why Did My Candle Sink in the Middle Before Burning?
A freshly poured candle develops a central depression because its wax shrinks as it cools, Candle Culture explains.
Pouring temperature also affects sink-hole formation: wax poured too hot can develop a sunken area, while wax poured too cool can develop jump lines. Different wax types and pouring temperatures need testing for the particular candle-making setup.
Real-World Beginner Observation
Beginner observation: a new candle maker found that their first few candles sank in the middle during drying despite looking even across the top when poured. Sides initially sat high before sinking as the candles dried, a beginner reported in r/candlemaking on March 6, 2023.
Sink holes also happen to professional candle makers, so a sunken center is not a problem confined to first attempts. The condition is a normal occurrence in candle making.
Check for Hidden Gaps Before Repairing the Top
A smooth candle top can conceal a sink hole beneath the surface. Check for hidden pockets of empty space before repairing the visible finish, even when the top looks level.
Use a wooden skewer or another pointed object as the suggested inspection tool. Pierce the surface to check beneath it, opening access to air pockets before remelting the top, as Candle Culture recommends.
Inspection and filling belong together: opening a concealed pocket gives the melted wax access to the space that needs repair. Candle Culture recommends poking holes before remelting, not simply smoothing the visible depression and assuming the interior is filled. Continue the repair until melted wax fills the sink hole and surrounding gaps and the surface is level.
Air bubbles in candles are linked to rushed work or pouring wax too quickly. Stir dye and fragrance gently, since vigorous stirring can trap air in the wax.
Container wax separation with a large air bubble calls for checking two possible causes: an improperly sized wick or water that entered the wax batch.
When I need nothing, I like hardware stores, which may explain why a candle top that appears flawless would still earn a suspicious look from me. For concealed cavities, I would probe the surface with a pointed tool before softening the wax, since a tidy finish can mask an empty pocket needing wax.
How to Fix Uneven Candle Burn or a Cooling Sink Hole
A cooling sink hole needs wax melted or added to fill the depression; uneven burning needs correction of the wick or dye problem responsible. Keep surface repair separate from changes intended to improve the candle’s burn.
Fill a Cooling Sink Hole
Cooling sink-hole repairs offer two approaches: remelting the existing wax or adding a thin layer from the original batch. Choose the repair that fits the wax available, then follow the relevant filling steps rather than treating the depression as a wick problem.
- Use a heat gun to melt wax into the depression and surrounding gaps. Continue melting until the wax fills the cavity and the surface is level. A blow dryer is an alternative tool for this repair.
- Leave the candle to cure after melting and filling. Allow the repaired candle to complete that stage before burning it.
- For a second-pour repair, use a small amount of wax retained from the same batch. Apply a thin layer while the candle is still warm, without raising the fill above the original pour level.
- Avoid overheating the reserved wax. Keep the re-pour temperature only a couple of degrees below the first pour, rather than hotter; a cooler second pour affects color as the candle cools.

Candle making heat guns direct warm air onto wax to smooth tops, remove surface bubbles, and help blend layers or repairs. Compare adjustable temperature and airflow settings, corded or rechargeable designs, nozzle attachments, size, weight, and safety features such as heat shields or cool down stands.
As an Amazon Associate we earn from qualifying purchases.
A thin second pour while the candle remains warm is the most effective repair recommended by Cosy Owl. Massive sink holes present another decision: repairing one sometimes leaves a much smaller candle. Starting again with a new candle is an option when the resulting size makes repair unsuitable.
Correct a Burn-Related Problem
Uneven candle burn calls for attention to the wick rather than another layer of surface wax. Match the correction to the symptom: a small melt pool, smoke, and a slanted top involve different wick or dye adjustments.
Tunneling calls for a properly sized wick rather than one too small for the candle. Smoking associated with an oversized or overlong wick calls for a thinner wick or trimming to about half a centimeter. Slanted tops call for checking wick size, avoiding excessive dye that clogs the wick, and checking for water in the wax.
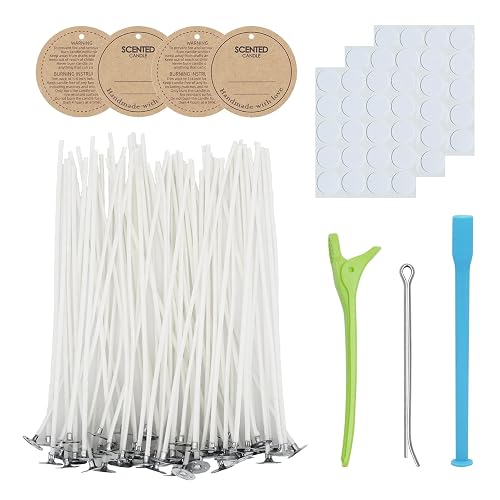
Candle making wicks are the cords that carry melted wax to the flame in container, pillar, and molded candles. Compare cotton, wood, and prewaxed options, along with wick diameter, length, tab style, and sizing for the wax type and candle vessel.
As an Amazon Associate we earn from qualifying purchases.
Pour Temperatures vs Flash Point
Pour temperatures concern how wax sets; a flash point concerns heating safety. Wax has a reported flash point of around 250°F, according to Cosy Owl. Keep melting and pouring tied to the temperature guidance for the wax being used.
Temperature examples need their specific context: a blend-specific pour range, a surface-defect recommendation, and a second-pour instruction address different conditions. Candle Culture’s paraffin-soy example concerns the blend used for its candles. Cooler pouring is recommended for minimizing sink holes, but pouring too cool introduces another problem: jump lines.
| Temperature Context | Reported Guidance | Application |
|---|---|---|
| Paraffin-soy blend | Between 145 and 155°F | Pour range for the particular blend, with testing at different temperatures. |
| White lines or frosty patches | Around 65°C | Pouring guidance for defects associated with cool wax or a cool container. |
| Second pour | Only a couple of degrees cooler than the first pour, not hotter | Temperature guidance intended to limit color changes as the candle cools. |
Pouring at around 65°C is recommended for addressing white lines or frosty patches associated with cool wax or a cool container. That recommendation is not a universal temperature for preventing sink holes.
One second-pour example uses 155°F after an initial pour at 150°F. Another recommendation calls for keeping the second pour only a couple of degrees cooler than the first, rather than using a hotter re-pour.
Repair temperature selection requires attention to the particular wax blend. Testing within that wax system matters more than treating either example as an all-purpose rule.
Excessively hot pouring contributes to sink holes. Experiment with wax-specific pouring conditions rather than assuming a temperature that suits one formulation will suit the next.
Wax heating requires a thermometer and attention throughout the process. Follow melting guidance as well as pouring guidance, and never leave wax unattended while heating. Translucent wax beginning to move in a snake-like pattern is a reported warning that it is nearing its flash point.
Prevent Sink Holes on the Next Pour
Preventing sink holes on the next pour starts with warming the container and allowing the wax to cool more evenly. Preheating addresses the container’s cooling conditions before wax goes in, while even cooling addresses the imbalance during setting. Both measures belong in the preparation process, rather than waiting until a depression needs attention.
Container warming can be done with a heat gun or an oven set to low heat. Choose one of these methods before pouring the wax so the container is already warm when filling begins. Heating the container is also a recommended precaution when making candles in a cold environment.
Crack prevention also involves controlling cooling, because wax that cools too quickly can crack. Warming the container before filling addresses that problem; another option is cooling the candle with its container submerged in warm water. Keep that water-bath method tied to crack prevention rather than making it an extra step for every surface defect.
Wax selection deserves testing alongside the conditions used for each batch. Treat those choices as part of developing the process, rather than assuming that changing wax alone will prevent every depression.
Small trapped bubbles call for attention to pouring and mixing rather than cooling alone. Rushing the pour or stirring dye and fragrance vigorously can introduce trapped air, so pour slowly into the warmed container. Gentle tapping after filling is another recommended way to encourage bubbles to rise (Cosy Owl).
Trapped air in a semi-cooled candle needs handling distinct from sink-hole prevention, so match the action to the problem. Use a hair dryer during that cooling stage to encourage the bubbles to rise.
Dye preparation provides another practical check for the next batch: stir thoroughly to distribute the color evenly, while avoiding vigorous mixing that traps air. Unevenly mixed dye causes spots on the candle surface. Before finishing the batch, use a small torch to look for streaks, giving the mixing stage its own inspection rather than judging only the finished candle’s appearance.
Frequently Asked Questions
Can a Blow Dryer Fix a Candle Sink Hole?
A blow dryer is an alternative to a heat gun for repairing candle sink holes. Repairing a massive sink hole can leave a much smaller candle, so consider starting again if the depression is extensive.
Should the Second Pour Be Hotter or Cooler than the First?
Following Cosy Owl’s guidance, a second pour should be only a couple of degrees cooler than the first; a larger temperature difference between pours can affect the candle’s color as it cools.
Does Switching to Soy Wax Prevent Sink Holes?
Changing wax is not an established guarantee against a sunken center. Candle Culture’s author describes beeswax as producing the worst sink holes in their experience, while soy tends to perform better. That observation supports experimenting with wax types, not assuming every soy formulation will set without a depression. Pouring temperature and even cooling still belong in the troubleshooting process, along with warming the container and checking beneath an apparently smooth top.
Should I Save Wax for Repairs Before Pouring?
Reserve a small amount from the same batch if you plan to use Cosy Owl’s thin-layer repair method. Keeping that wax available lets you make the recommended additional pour while the candle is still warm. Remelting with a heat gun remains another repair approach, but concealed pockets should be opened before smoothing and filling the top.
References
- Reddit – The heart of the internet, Reddit, reddit.com
- Candle Sinkholes: Why They Happen + How to Fix & Prevent Them – candle culture, candle culture, candleculture.blog
- The Sink – Boulder's Best Burger Restaurant and Bar, The Sink, thesink.com
- Sink or Swim | Dartmouth Alumni Magazine, Dartmouth Alumni Magazine, dartmouthalumnimagazine.com
- Candle Making FAQs | Cosy Owl, Cosy Owl, cosyowl.com
Sources read in September 2026.