
How to Connect an External Camera to a Mac (USB and Wireless)

You can connect an external camera to a Mac through a USB cable or a wireless Wi-Fi connection, and the method depends on the camera you own. Most USB webcams follow the UVC standard and work the moment you plug them in, because macOS already includes the driver. Canon cameras and similar wireless models need the manufacturer’s software, such as Canon’s EOS Utility, before the Mac will find them over Wi-Fi. DSLRs need an extra step: a capture card, a direct USB connection, or a wireless app, depending on how you plan to use the camera. Once the camera is connected, pick it from the video menu in FaceTime, Photo Booth, QuickTime Player, or any app that asks for camera access.
How to Connect an External USB Camera to a Mac
Plug a UVC compliant USB camera into a free port and the Mac recognizes it without any driver install. UVC, short for Universal Video Class, is the standard protocol that USB video devices use to work with a computer’s built in drivers, and it has covered Mac OS 10.4.9 and later. That single standard is why most modern webcams from brands like Logitech, Razer, and Anker show up automatically in FaceTime or Zoom.
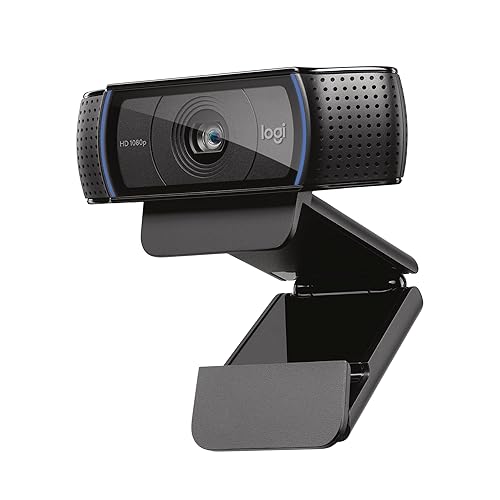
UVC compliant USB webcams are external cameras that connect to a Mac for video calls, streaming, recording, and remote meetings. Compare resolution, frame rate, field of view, built in microphones, privacy shutters, mounting options, cable length, and whether the camera supports USB C directly or needs an adapter.
As an Amazon Associate we earn from qualifying purchases.
- Check the port: connect the camera to a USB 2.0 or SuperSpeed USB 3.0 port for reliable operation and full frame rates.
- Plug in the cable: insert the USB cable into the Mac and wait a few seconds for the system to register the new device.
- Open an app: launch FaceTime, Photo Booth, or another camera app to confirm the picture appears.
- Install extra software if wanted: add manufacturer tools such as Logi Options+ only if you want extra features beyond the basic picture, since the standard driver already provides core functionality.
Most consumer webcams use UVC 1.1, which tops out at 1080p resolution, while newer models use UVC 1.5 and can reach 4K. Nothing needs to be downloaded for either version because the class driver ships inside macOS itself. This plug and play behavior is the simplest of the three connection types covered in this guide.
How to Connect a Camera to a Mac over Wi-Fi
Wireless connection works by installing the camera maker’s companion software and joining the same Wi-Fi network as the Mac. Canon is the clearest documented example: its EOS Utility software handles the wireless link between a Canon camera and a Mac, and the steps apply closely to similar wireless cameras from other brands.
- Download EOS Utility: get the software from Canon’s website and install it on the Mac before touching the camera menu.
- Turn on Wi-Fi in the camera: open the camera’s menu, enable the Wi-Fi function, and choose EOS Utility as the connection type.
- Match the networks: confirm the camera and the Mac are joined to the same Wi-Fi network, since the two devices cannot see each other otherwise.
- Open EOS Utility on the Mac: the app should detect the camera and offer live view, remote shooting, or file transfer options.
Signal strength matters more for wireless cameras than for USB ones. Keep the camera and the Mac close together, and choose the 5GHz Wi-Fi band when the router offers it, since that band carries a faster transmission speed than the older 2.4GHz band. Update both the camera firmware and the Mac software before attempting the pairing, because a version mismatch is a common reason the two devices fail to find each other.
How to Use a DSLR as a Webcam on a Mac
Turning a DSLR into a Mac webcam happens through one of three routes: a capture card, a direct USB connection, or a wireless app, and each trades cost against convenience. All three require disabling the camera’s auto shutoff, switching to video mode, and setting the focus manually before the picture will stay steady.
Capture Card Method
Capture cards convert the DSLR’s HDMI output into a USB webcam signal the Mac can read directly. This is the most versatile of the three options and the one most people settle on for regular use.
Hardware such as the Elgato Cam Link is a common example, and pricing for a capture card typically starts around $80 and climbs past $100 for higher end models as of September 2026. Because the card does the conversion, no extra driver or app runs on the Mac itself, and video quality stays close to what the camera’s sensor actually captures.
Direct USB Method
Many DSLR makers publish a free utility that lets the camera act as a webcam over a plain USB cable, skipping the capture card entirely. Resolution and frame rate through this route tend to be lower than the HDMI path, since the camera is compressing video for a USB connection rather than passing a full signal through. Mac support varies by brand, so check that the manufacturer lists macOS compatibility before relying on this method for something like a livestream.
Wireless Streaming Method
Newer DSLRs with built in Wi-Fi can stream to a Mac through the manufacturer’s own app, with no cable at all. The tradeoff is a drop in video quality and some added latency compared with a wired link, so this route suits casual use more than a paid video call.
None of the three DSLR methods send audio over USB or HDMI, so plan on an external microphone as a separate piece of gear. A dummy battery or USB power adapter is worth adding too, since long recording sessions drain a normal camera battery quickly.
Comparing Camera Connection Methods
The table below lines up the five common ways to get a camera picture onto a Mac, from a basic USB webcam to a wireless DSLR feed.
| Method | Hardware Needed | Software Needed | Typical Resolution | Setup Difficulty |
|---|---|---|---|---|
| USB UVC camera | USB cable, UVC compliant camera | None, built in drivers | Up to 4K with UVC 1.5 | Simple |
| Wi-Fi Canon camera | Wi-Fi router, charged battery | Canon EOS Utility | Varies by camera model | Moderate |
| DSLR via capture card | HDMI cable, capture card ($80 to $100+), power | None, pass through | 4K or higher possible | Moderate |
| DSLR via USB | USB cable | Manufacturer software | Lower than HDMI | Moderate |
| DSLR wireless | Wi-Fi router, charged battery | Manufacturer app | Variable, with latency | Moderate |
USB UVC cameras remain the easiest starting point for anyone who just wants a working webcam without extra spending. The capture card route costs more upfront but delivers the closest thing to the DSLR’s native image quality, which is why it shows up so often in home studio setups.
The Fujitsu ScanSnap iX1300 receipt scanner I have owned since 2023 keeps my paper pile modest, but it also confirms that dedicated gear is only charming until it asks for another cable or setting. In Comparing Camera Connection Methods, I would keep the same check: a USB UVC camera makes more sense when a dependable webcam matters more than added DSLR equipment.
Which Adapter Do You Need for an Older Camera on a Modern Mac
A current Mac with a Thunderbolt or USB-C port needs a USB-C to USB-A adapter to accept an older camera’s USB-A cable. Apple sells its own version, the Apple USB-C to USB Adapter, and third party versions from other brands work the same way. Any of these adapters support data transfer speeds up to 5Gbps, which corresponds to the USB 3.1 Gen 1 standard.

USB C to USB A adapters connect USB C devices or cables to older USB A ports, often for printers, storage drives, and accessories. Options include compact plug adapters, short cable adapters, and multiport hubs, with differences in data speed, power support, port count, and housing material.
As an Amazon Associate we earn from qualifying purchases.
| Adapter Type | Input | Output | Speed | Works With |
|---|---|---|---|---|
| USB-C to USB-A (generic) | USB-A | USB-C | 5Gbps | All USB-C and Thunderbolt 3+ Macs |
| Apple USB-C to USB Adapter | USB-A | USB-C | 5Gbps | Official Apple option |
| Third party USB-C adapter | USB-A | USB-C | 5Gbps | Any USB-C Mac |
Every USB-C or Thunderbolt port on a current Mac, including Thunderbolt 3, Thunderbolt or USB 4, Thunderbolt 4, and Thunderbolt 5, accepts both a Thunderbolt cable and a plain USB-C cable, so a basic adapter is all a UVC or DSLR camera needs. Older cameras with a FireWire or DV port are a harder case.
Adapters for those older connectors are more complex and some do not fit newer MacBook Pro, MacBook Air, or 24-inch iMac models at all, because Apple changed the physical Thunderbolt connector on those machines. Anyone still working with FireWire footage should confirm compatibility with the specific adapter before buying, since a mismatch means the camera simply will not connect.
How to Select Your External Camera in Mac Apps
After connecting an external USB webcam, open Photo Booth and choose Camera, then select the external webcam from the available options. A general USB-camera guide claims that this selection will also be used by other installed Mac programs, though Apple material here does not document that behavior.
In FaceTime, check for a camera preview to help determine whether the issue is specific to another app. For a DSLR connected by USB, choose the camera as the video input in the calling or recording app after turning on the camera and switching it to Movie or Video mode.
Apps must be approved before they can use camera hardware after macOS Mojave. In Zoom, go to Settings > Video and choose the DSLR under the Camera dropdown. Beyond that, in OBS, use Sources > Video Capture Device, then select the DSLR input. macOS restricts camera access to one application at a time, so fully quit other possible camera users before trying again.
What to Do if Your External Camera Still Does Not Work
Start with camera permissions, since macOS has blocked apps from the camera by default since macOS Mojave and a missed approval is the most common cause of a dead feed. Work through the checks below in order before assuming the hardware has failed.
- Grant permission: open Privacy & Security in System Settings, select Camera, and turn on the switch beside the app that needs access.
- Close competing apps: only one application can use the camera at a time, so quit Zoom, Teams, FaceTime, or any browser tab that might also be holding it open.
- Check parental controls: Screen Time restrictions can block camera access outright and need to be turned off in System Settings if they apply.
- Restart the Mac: a restart clears the temporary processes behind most software glitches affecting a camera.
- Force quit camera processes: in Terminal, run sudo killall VDCAssistant and sudo killall AppleCameraAssistant to reset the camera service without a full restart.
- Update macOS: install the latest system update, since Apple ships camera driver fixes through regular macOS patches.
- Check System Report: open the Apple menu, choose About This Mac, then System Report, and look for the camera under USB or the relevant hardware section. If it is missing there, macOS cannot see the hardware at all.
- Reset the SMC: resetting the System Management Controller can re-establish a connection for a camera that will not show up anywhere in the system.
Test the camera in FaceTime or Photo Booth first whenever a fix seems to work, since those built in apps make it easy to tell whether a problem is specific to one app or affects the whole system. If every step above fails to bring the camera back, the hardware itself has likely failed and needs professional repair rather than another software fix.
This guide does not rate capture cards by video quality on this page; choose one that suits your camera and Mac ports.
Frequently Asked Questions
Can I Use an iPhone as an External Camera on a Mac?
Apple’s own camera continuity feature lets a nearby iPhone act as a webcam for a Mac without any cable, separate from the third party cameras covered in this guide. That option sits alongside, not instead of, the USB and Wi-Fi methods described above for standalone cameras and DSLRs. Check the camera menu in FaceTime or another video app for the iPhone listed as a source.
Do I Need Special Drivers for a USB Webcam on a Mac?
No driver installation is required for any UVC compliant USB webcam, because macOS has included the class driver since Mac OS 10.4.9. Manufacturer software such as Logi Options+ is optional and only adds extra controls beyond the basic picture. A camera that does not follow the UVC standard is the rare exception that might need its own driver.
Why Does My Mac Not Recognize My External Camera?
Camera permission settings block most cameras that fail to appear, since macOS requires explicit approval per app since macOS Mojave. A cable fault, a port that lacks enough power, or another app already holding the camera open are the next most likely causes. Working through the permission and process checks above resolves the issue in nearly every case.
Can I Connect a Camera to a Mac Without Wi-Fi or USB?
Bluetooth camera support exists on some models, though documentation on it is limited compared with the well covered USB and Wi-Fi routes. For dependable results, a UVC USB camera or a Wi-Fi model with the manufacturer’s app remains the safer choice. Check the camera’s own manual for any Bluetooth pairing steps if the model supports it.
Does FaceTime Work with Any External Camera on a Mac?
FaceTime works with any camera the Mac already recognizes, whether that is a UVC USB webcam or a camera connected through a manufacturer’s software layer. Once the camera shows up under Video in the FaceTime menu bar, selecting it is enough to switch the call over to that source. A camera that does not appear there needs the connection and permission steps covered earlier in this guide first.
Getting an external camera working on a Mac comes down to matching the connection type to the camera: plug in a UVC USB webcam and it just works, pair a Wi-Fi camera through its own app, and give a DSLR a capture card or manufacturer utility if it needs to double as a webcam. When a camera that used to work suddenly stops, permission settings and a quick SMC reset solve the problem more often than a hardware replacement does.
References
- Use an external camera with Mac, Apple Support
- UVC webcam support for Mac OS 10.4.9 and later, Logitech Support
- How To Connect Canon Camera To Mac Through Wifi?, Kent Faith Blog
- How to Use a DSLR as a Webcam: Top Methods, Step by Step + Tips, Riverside Blog
- How to Fix Camera Not Working on Mac – 11 Quick Fixes, OBSBOT Blog
- Adapters for the Thunderbolt or USB-C port on your Mac, Apple Support
- Thunderbolt adapter guide: How to connect anything to a USB-C Mac, Macworld
- About the Apple USB-C to USB Adapter, Apple Support
Sources read in September 2026.