
How to Connect RPi to Laptop Without a Monitor

The answer to how to connect rpi to laptop without a monitor is to put both devices on the same local network and enable Secure Shell (SSH) on the Pi. Open a laptop terminal and connect to the Pi using its hostname. Virtual Network Computing (VNC) is the alternative when you need a full remote desktop.
Remote access lets the laptop control the Raspberry Pi rather than act as a directly connected display. Internet access is unnecessary when both devices can reach the same local network. An Ethernet cable also provides a direct laptop-to-Pi connection option.
What Equipment and Software Are Needed?
Raspberry Pi headless access requires a Pi board, a microSD card containing its operating system, power, a network connection, and remote-access software on the laptop. Terminal access uses Secure Shell (SSH), while desktop control uses VNC. Choose the laptop software for the kind of access needed before preparing the card.
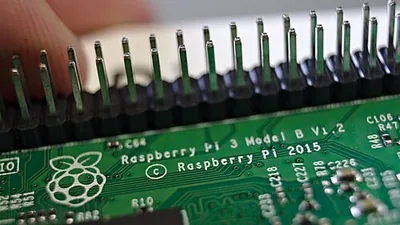
Raspberry Pi boards are compact single board computers used for coding, electronics projects, media systems, and networked devices. Models differ in processor generation, memory capacity, wireless connectivity, ports, display support, and physical form factor.
As an Amazon Associate we earn from qualifying purchases.
Logo: Raspberry Pi 3 silkscreen logo and GPIO header.jpg by Florian Knodt – https://www.flickr.com/photos/adlerweb/, CC BY 2.0, via Wikimedia Commons
The microSD card holds Raspberry Pi OS, and an existing installation provides the starting point for setup. A blank card needs an operating system written to it before the board starts. Etcher is one tool used to write a Raspberry Pi operating system image to a microSD card for a monitorless setup.
Power starts the Pi after the prepared card is inserted; the headless setup instructions use a USB power connection. Booting after power and Ethernet are connected takes up to 90 seconds in the FactoryForward setup example. Frequent blinking from the Pi’s activity light indicates card activity during startup, rather than readiness for a laptop connection.
Router access provides a network path with the Pi connected by Ethernet and the laptop connected to that router through Wi-Fi or Ethernet. Preconfigured Wi-Fi offers another route for the Pi. Keep the chosen network’s Wi-Fi credentials ready when configuring wireless access while writing the card or editing its configuration afterward.
For viewing the graphical user interface, a 100Mbps Ethernet connection is sufficient, users on the Raspberry Pi Forums report.
Laptop terminal software provides the command-line route to the board once its SSH server is enabled. PuTTY is an SSH client for this job, and the default SSH port is 22. An Ubuntu laptop terminal also supports the connection command, so the software choice follows the laptop environment rather than requiring a desktop viewer.
VNC Viewer belongs on the laptop when the goal is controlling the Raspberry Pi desktop. Desktop access also requires a VNC server running on the Pi, making both ends part of the software checklist. Reddit users describe graphical application forwarding through SSH to a local X server as a separate option from a full remote desktop.
The equipment and software checklist is where I need restraint: I like hardware stores when I need nothing, a trait unlikely to improve a headless Raspberry Pi setup. Confirming the necessary kit and matching the laptop application to terminal or desktop access before starting keeps my errand from becoming a cart full of unrelated solutions.
Prepare Raspberry Pi OS for Headless Access
Preparing Raspberry Pi OS means writing the operating system to a microSD card and setting up remote access before the first boot. Headless setups use Secure Shell (SSH) for that remote connection. Older Raspbian installations require an empty file to enable SSH and a separate file for wireless configuration.
Check whether the card already contains Raspberry Pi OS before installing an operating system. A blank card needs an image written to it; the Raspbian Lite installation procedure uses Etcher for that task. Download and unzip Raspbian Lite, then use Etcher to write the operating system image to the microSD card.
Remote-access settings belong in the preparation stage, while the laptop is creating or editing the boot media. Software used to create that media includes remote-access settings, posters on the DroneBot Workshop Forums report. Within Raspberry Pi Imager, enable SSH in the remote-access section before proceeding with a monitorless installation.
Legacy Raspbian images support enabling SSH by placing an empty file named ssh in the card’s /boot/ directory (NotEnoughTech). Keep the filename exactly, without an extension: ssh.txt is incorrect. Creating this file turns on the SSH server for the older installation procedure, which otherwise leaves that server disabled by default.
Linux users following the Raspbian Lite procedure can create that file with sudo touch /media/xyz/boot/ssh. Replace xyz with the appropriate location for the microSD card mounted on the laptop. Here, the path identifies the card’s boot directory, so the command targets the installation media being prepared rather than a directory on the running Pi.
Wireless preparation also happens before the card goes into the board. An older manual Raspbian procedure places a file named wpa_supplicant.conf in the card’s /boot folder for Wi-Fi configuration.
Reddit users report entering Wi-Fi credentials in the official utility while flashing the card, rather than editing configuration files afterward. Their accounts offer a useful distinction between preparing a new installation and adjusting an already flashed card. Treat the manual Raspbian file instructions as an older procedure, not a promise that every current operating system image uses the same setup method.
Startup begins with the prepared card inserted into the Raspberry Pi and power and Ethernet connected. Allow up to 90 seconds for a complete boot, following FactoryForward’s guidance. Frequent blinking of the activity (ACT) light signals card activity during boot, offering a visible check without a monitor.
How to Connect RPi to Laptop Through SSH
Secure Shell (SSH) access to a Raspberry Pi requires the board and laptop to share a local network. After the prepared board boots, open a terminal on your laptop and connect using the Pi’s hostname or assigned network address.
Posters on the DroneBot Workshop Forums recommend putting the Pi and Windows laptop on the same router, then connecting with PuTTY, as the simpler arrangement. They also describe SSH traffic in that setup as staying on the local network rather than traveling over the internet.
- Connect the Pi to your router with an Ethernet cable, and connect the laptop to that same router.
- Attach power to start the Pi and let startup finish.
- Sign in to the router administration page and inspect its connected-device list to find the Pi’s assigned Internet Protocol (IP) address.
- Open the laptop terminal, then use the connection example in the table with your configured username and hostname substituted.
Router device entries sometimes identify the board as pi.raspberry or a similar name. Checking connected devices is the recommended discovery method in Atomic Object’s walkthrough. Match the Pi’s entry rather than selecting the laptop’s entry when choosing an address for remote access.
Choose the Pi’s Address, Not the Laptop’s
Network examples refer to different devices and connection arrangements, so use the address assigned on your own network. Each address in the table belongs to its named walkthrough, not to every Raspberry Pi. Notice that the Windows sharing example identifies the laptop’s Ethernet port, while the other address examples identify the Pi.
| Item | Example Value | Meaning for Your Connection |
|---|---|---|
| Hostname in Raspberry Pi Forums | RaspberryPI | Replace this example with the hostname configured on your board. |
| SSH command in Raspberry Pi Forums | ssh -X pi@RaspberryPI.local | Replace the example account and hostname with your own settings. |
| Pi address in FactoryForward | 169.254.0.2 | Example address used for its connection walkthrough. |
| Pi address in NotEnoughTech | 192.168.1.7 | Example local address for the board. |
| Laptop Ethernet address in NotEnoughTech | 192.168.137.1 | Example Windows internet-sharing address, not the Pi’s address. |
| Pi address in Noel Evans’ walkthrough | 192.168.0.18 | Example discovery result to replace with your assigned address. |
Windows users can connect through PuTTY, a Secure Shell (SSH) client, using port 22 for SSH connections. Address-based terminal access uses ssh pi@[the Pi’s IP Address], substituting your account name and the board’s assigned IP address. Brackets identify the address placeholder and must be omitted from the command.
Understand the Connection Options
Graphical applications launched through the table’s command use its -X option to display their windows on the laptop. Terminal access and individual application windows serve different needs from a full remote desktop.
A laptop operating system with sharing support can pass its Wi-Fi internet connection over Ethernet to the Pi. Connecting the laptop and Pi through the router removes the need for laptop internet sharing.
One DroneBot Workshop Forums user reports that sharing internet through Wi-Fi slowed internet access on both their PC and Pi and made reversing the settings time-consuming. That is a reported experience, not a guaranteed outcome. For a first connection, consider the community’s preference for a shared router before adding a separate internet-sharing configuration.
Set up Raspberry Pi VNC for Desktop Access
Raspberry Pi VNC access requires a running VNC server on the Pi and VNC Viewer installed on the laptop. Prepare the Pi side first, then open the laptop application and connect using the Pi’s network address to control its desktop remotely.
Prepare the Raspberry Pi Server
A VNC server provides access to the Raspberry Pi desktop, so installing the laptop application alone is not the complete setup. Enable and run the server on the Pi before attempting a desktop connection. Treat server preparation as a separate task from installing the viewer: the two applications belong on different machines.
Network access between the devices is enough for VNC; an internet connection is not required. Desktop traffic also needs less than 100 megabits per second of bandwidth, according to the Raspberry Pi Forums. A direct Ethernet cable supplies the connection between machines, but the desktop-access software is still required.
Connect from the Laptop Viewer
VNC Viewer lets the laptop display and control the Raspberry Pi’s remote desktop. Install the viewer on the laptop, launch the application, and enter the Raspberry Pi’s address as the connection target. Keep the server and viewer roles separate during setup: neither application replaces the other.
Laptop software provides remote access to the Pi’s desktop without connecting the Pi directly to the laptop’s built-in screen. A headless Raspberry Pi 400 displayed “Cannot currently show the desktop” in VNC Viewer when no display was connected, in an example documented by Atomic Object.
What Does the VNC Display Suffix Mean?
The VNC display suffix is the part after the colon in the connection-address example 169.254.0.2:1. FactoryForward’s example uses the format IP address:1 in VNC Viewer, with :1 as the display suffix.
Reading that example, 169.254.0.2 is the Pi’s network address, while the colon separates it from the display selection. Treat the complete entry as an example for that setup, rather than a mandatory address for every Raspberry Pi connection.
When Can USB Gadget Mode Replace Ethernet?
USB gadget networking can replace Ethernet when a Raspberry Pi is configured to act as a network device through Universal Serial Bus (USB). Raspberry Pi Zero and Raspberry Pi 4 Model B running Raspberry Pi OS support this connection approach, according to the Raspberry Pi Forums.
Pi Zero setup involves changes to config.txt and cmdline.txt so the board operates as a USB gadget for network sharing. Configuration is part of the connection, rather than simply attaching a cable between the board and laptop. Network-over-USB is the relevant operating mode for this headless raspberry pi setup.
Powering the Raspberry Pi from the laptop is another part of the documented gadget approach. Power delivery and network access serve different purposes: the former starts the board, while the latter provides the connection for remote access. A USB cable alone does not replace the board configuration or remote-access software.
Frequently Asked Questions
Why Does Raspberrypi.local Fail to Connect?
The raspberrypi.local hostname relies on name resolution; Bonjour maps that hostname to an IP address. Windows connections sometimes require additional multicast Domain Name System (mDNS) software, while modern Linux and macOS connect without extra configuration, readers on Reddit report.
Can Arp -a Identify the Wrong Device?
Comments on Atomic Object’s walkthrough warn that running arp -a on the laptop can return the laptop’s own IP address rather than the Pi’s. Use the router’s connected-device list to check the target instead of copying an address without checking which machine it belongs to.
Are Pi and Raspberry Universal Login Credentials?
Connect with the account configured for your installation instead. Hostnames also vary between examples, so an account name, hostname, and network address copied from a walkthrough should not be assumed to describe your board.
Can Raspberry Pi Desktop Run on the Laptop Instead?
Raspberry Pi Desktop can run on PCs and Macs, but installing it is different from connecting to a separate Pi board. A Raspberry Pi Forums contributor reports that Raspberry Pi Desktop ran well on an old laptop with 2GB of RAM. Its appearance is virtually identical to Raspberry Pi OS, while functionality specific to Pi boards is absent.
Choose that approach only if the goal is using the desktop environment on the laptop itself. Remote access remains the relevant approach when the goal is controlling the operating system running on the separate Raspberry Pi. For regular full-GUI use, Reddit users also suggest considering a cable and monitor rather than relying on a laptop connection.
References
- Taps monitor* – is this thing on? – Raspberry Pi, Raspberry Pi, raspberrypi.com
- Is it possible to use a Rasberry PI on a laptop? – Raspberry Pi Forums, Raspberry Pi Forums, forums.raspberrypi.com
- Connect to Raspberry Pi 4 from Laptop, Raspberry Pi, DroneBot Workshop Forums, DroneBot Workshop Forums, forum.dronebotworkshop.com
- How to connect Raspberry pi 3 to laptop?, Reddit, reddit.com
- How to Connect Raspberry Pi to a Laptop in 6 Easy Steps, Atomic Object, spin.atomicobject.com
- Connect Raspberry Pi to laptop PC in 4 simple steps (internet too) – NotEnoughTech, NotEnoughTech, notenoughtech.com
- How to Connect Raspberry Pi with Laptop, Headless Setup, FactoryForward, FactoryForward, factoryforward.com
- Setup Raspberry PI 3 with no (ethernet) cable, monitor, noelevans.co.uk
- raspberrytips.com, raspberrytips.com
- Wikidata Q245 / Wikipedia, Raspberry Pi, en.wikipedia.org
Sources read in September 2026.