
How to Put Windows XP on a USB Drive (Bootable Installer)

To put Windows XP on a USB drive, you need a 32-bit XP ISO file, a flash drive of at least 1 GB, and a tool that can write an XP installer to removable media. Rufus is the usual pick: set the partition scheme to MBR only, choose NTFS as the file system, load the ISO, then click Start. YUMI Legacy, WinToUSB, WinSetupFromUSB, WinToFlash and PowerISO all reach the same result by different routes. Harder than the drive itself is the target machine, which needs legacy USB support in its BIOS and a USB 2.0 port to boot from.
What You Need to Put Windows XP on a USB Drive
Along with the stated ISO and USB flash drive, you need a working Windows PC to build the drive on, and a target machine whose BIOS can boot from USB media. Miss any one of them and the build either fails outright or produces a drive the old PC ignores.
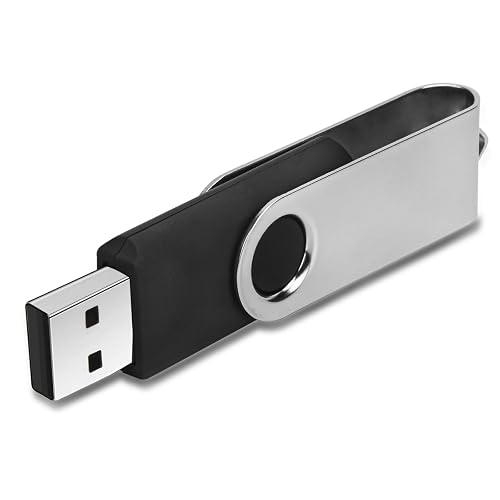
USB 2.0 flash drives are portable storage devices for moving files between computers and creating bootable installation media. Compare storage capacity, connector design, physical size, cap or retractable protection, and added features such as key rings, encryption, or write protection.
As an Amazon Associate we earn from qualifying purchases.
Getting the ISO is the part most people underestimate. Techgage, which tested installer creation across several Windows releases, found that 64-bit XP had limited success. If your disc or image is the 64-bit edition, expect trouble at either the build stage or the first boot.
Drive size is the easy requirement. A 1 GB stick is the stated floor, and a plain XP i386 folder leaves room to spare on a 4 GB or 8 GB drive. Speed matters more than capacity, because setup reads thousands of small files off the stick during installation.
Microsoft’s archived documentation covers booting Windows XP Embedded, not creating an XP installer. It asks for certified hi-speed USB 2.0 media with a minimum write speed of 9 MB per second and SLC NAND flash for consistent performance, and it states plainly that USB 1.1 performance is unsatisfactory and not supported. That same page notes USB boot works from USB Mass Storage and flash media only, not from an El Torito CD sitting in a USB optical drive.
Why the Drive Has to Be NTFS and MBR
Use those settings. FAT32 is the wrong answer for an XP installer built with Rufus, and GPT is the wrong answer for any machine old enough to want XP. MBR keeps the drive readable by the BIOS and by the compatibility support module on newer firmware, which is what lets the boot sector run at all.
NTFS also sidesteps the 4 GB single-file ceiling that FAT32 imposes, which matters if you ever put a larger image on the same stick. For XP alone the file sizes are small, so treat NTFS as a compatibility choice rather than a capacity one.
Why Only a 32-bit XP ISO Works
Tools that build XP installers were written around the 32-bit i386 layout, which is the folder setup actually runs from. Sources that tested both editions report the 64-bit version working only sometimes, and none of them treat it as the default. Sticking to 32-bit removes a whole class of failure before you start.
Windows XP USB Requirements at a Glance
Every requirement that decides whether the drive boots sits in one place below, covering the tools, the media, the ISO edition, the firmware settings and the command that launches setup.
| Aspect | What It Has to Be |
|---|---|
| Tools that work | Rufus 32-bit (most cited), YUMI Legacy, WinToUSB, WinSetupFromUSB, WinToFlash, PowerISO |
| USB drive | 1 GB minimum, certified hi-speed USB 2.0 media, 9 MB per second write or better |
| File system | NTFS, not FAT32 |
| Partition scheme | MBR only, not GPT |
| Windows XP edition | 32-bit ISO (64-bit has limited success) |
| Port used to boot | USB 2.0 port, never a USB 3.0 port |
| BIOS support needed | INT 13h services, USB legacy support enabled |
| Modern firmware settings | CSM or legacy boot on, internal hard disk in AHCI not RAID, USB set to EHCI with XHCI disabled |
| Boot device key | F12 at startup, boot order left at its default |
| Setup command (PowerISO route) | E:\i386\winnt32.exe /syspart:C: /tempdrive:C: /makelocalsource |
Which Tool Works Best for a Windows XP USB Installer
The default recommendation remains the same. Techgage puts its success rate above the alternatives for XP specifically.
Not every guide agrees. Wondershare lists WinToUSB, WinSetupFromUSB, Rufus and WinToFlash as four methods, describing WinToUSB as the simplest guided option and Rufus as the fastest and most convenient. Techgage is the more useful voice on the question, because that article is a hands-on comparison of building installers for several Windows versions rather than a list of products, and because Rufus is the only tool all three guides name.
Pick by what you already have. Someone with a clean XP ISO and a spare stick should start with Rufus. Anyone who wants several installers on one drive is better served by YUMI Legacy or WinSetupFromUSB, both built for multiboot. Those who prefer a wizard that asks fewer questions tend to land on WinToUSB or WinToFlash, the latter of which also ships with multilanguage support.
| Tool | Best For | How It Handles the ISO |
|---|---|---|
| Rufus (32-bit) | Highest reported success rate with XP | Load the ISO through the CD icon, Rufus does the rest |
| YUMI Legacy | One stick holding several installers | Needs an ISO ready, then pick Windows XP Installer from the distribution list |
| WinToUSB | Fewest decisions, wizard driven | Wizard points at the source image |
| WinSetupFromUSB | Several Windows setup files on one drive | Adds XP alongside other Windows versions |
| WinToFlash | Friendly interface, multilanguage support | Guided prompts from source to finished drive |
| PowerISO | Machines that refuse a plain XP boot sector | Rescue drive first, then copy the i386 folder by hand |
Where the Guides Disagree on ISO Preparation
One real split between sources concerns how much file handling you do by hand. PowerISO’s tutorial has you create a rescue drive based on Windows PE 3.11 and then copy the XP i386 folder onto the stick yourself, while the YUMI and Rufus routes take the ISO as input and lay out the drive for you. Neither approach is wrong, and the manual copy simply exposes a step the other tools hide.
If you do not have an ISO at all, only a physical XP disc, you need to make one first. Lance’s Tech Blog uses LC ISO Creator for that job before YUMI ever opens.
I like a maker’s PDF manual because it is less likely than my own confidence to turn a straightforward Windows XP USB installer into an archaeological project. For this section’s Windows XP USB installer, I would check whether the chosen tool accepts the ISO directly before copying the i386 folder by hand; fewer improvised steps means fewer opportunities for me to misread a prompt and blame the computer.
How to Create the USB Installer with Rufus
Run the 32-bit Rufus build, select your USB device, and load the XP ISO through the CD icon. Rufus wipes the drive and writes the installer without asking anything else.
Rufus Settings That Matter
Three settings decide the outcome. An XP installer written for GPT will not boot on hardware that predates UEFI or on modern firmware running in compatibility mode. Device has to be the flash drive itself and nothing else, since Rufus formats whatever is selected without a second warning.
Running Rufus Step by Step
- Plug the drive into a USB 2.0 port. Back up anything on it first, because the following steps erase it completely.
- Open the 32-bit version of Rufus. That build is the one reported to work most consistently with XP images.
- Choose the device. Confirm the drive letter and the capacity match the stick you just plugged in.
- Leave any GPT option alone.
- Change it by hand if Rufus preselects FAT32.
- Click the CD icon and load the Windows XP ISO.
- Click Start and wait. Rufus reports when the drive is ready, so do not pull it out before that.
Nothing in that sequence asks for a product key. Activation comes later, during Windows setup itself, and it has nothing to do with how the stick was built.
How to Use YUMI, WinToUSB, and the Other Tools
Each alternative reaches the same destination, which is a drive the old machine can boot. What changes is how much of the work you do yourself and whether the stick can hold more than one installer.
YUMI Legacy
YUMI Legacy, short for Your Universal Multiboot Installer, expects an ISO and a drive letter. Launch YUMI Legacy, select the drive letter of your USB stick, choose Windows XP Installer from the distribution list, browse to the ISO file, then click Create.
Because YUMI is a multiboot tool, the same stick can later carry other entries alongside XP. That flexibility is the main reason to choose it over Rufus.
WinToUSB, WinToFlash and WinSetupFromUSB
WinToUSB is the shortest path for anyone who dislikes options, since its wizard walks through source, destination and mode in order. WinToFlash covers similar ground with a friendly interface and multilanguage support, which helps when English is not your first language. WinSetupFromUSB earns its place by holding several Windows setup files on one drive, so an XP installer can share a stick with a later Windows version.
The PowerISO Rescue Media Route
PowerISO takes a different tack, building a rescue drive first and adding the XP files afterwards. Its tutorial uses the rescue media utility with Windows PE 3.11 as the boot environment, and once that drive exists you copy the XP i386 folder onto it. Setup then runs from the PE environment rather than from a stock XP boot sector.
That extra layer means the machine boots into Windows PE first and only then reaches XP setup, which is why the PowerISO route needs its own command to launch the installer.
BIOS Settings That Let the USB Drive Boot
Turn on USB legacy support, enable CSM or legacy boot mode if the firmware is UEFI, set the internal hard disk mode to AHCI instead of RAID, and set the USB controller to EHCI with XHCI disabled. Those four switches account for most cases where a correctly built drive still does nothing.
Legacy USB support exists so the firmware can emulate old PS/2 style communication, exposing the keyboard and the drive through INT 9h and INT 13h. Without it, XP setup may not see the stick it booted from, or the keyboard may go dead at the first prompt.
Microsoft’s archived requirements page is blunt about the firmware side. The BIOS has to support INT 13h in line with the BIOS Enhanced Disk Drive Services 2 specification and the USB Mass Storage Specification for Bootability. A machine whose firmware predates those specifications, or a modern one with no compatibility module at all, cannot boot the drive no matter which tool built it.
Menu Names to Look For
Firmware vendors label these settings differently, so hunt for the wording rather than a fixed path. The names used across the guides are USB Legacy Support, CSM or legacy boot mode, Internal Hard Disk Mode for the AHCI setting, and a USB option offering EHCI USB 2 against XHCI. On a machine where none of those strings appear anywhere in the firmware menus, there is probably no legacy path to find.
Boot order can stay at its factory setting. Pressing F12 during startup brings up a one-time boot device menu on most desktops and laptops, and picking the USB drive there avoids rearranging anything permanently.
Why USB 3.0 Ports Fail
USB 3.0 ports are not supported for an XP install, so use a USB 2.0 port for both building the drive and booting from it. Techgage and Wondershare’s guide each single out USB 2.0, and Microsoft’s archived requirements ask for certified hi-speed USB 2.0 media. Where a machine offers nothing but newer ports, setting the USB controller to EHCI in firmware is the closest available workaround.
Installing Windows XP from the USB Drive
Boot the target PC from the stick using F12, prepare the internal disk with DiskPart, then run setup from the i386 folder on the USB drive. On a drive built by Rufus or YUMI, setup usually starts on its own once you pick the USB entry from the boot menu.
Preparing the Target Disk with DiskPart
PowerISO’s walkthrough has you clear and format the internal drive before launching setup. Open a command prompt in the booted environment, start DiskPart, and work through four commands in order.
- select disk 0 picks the internal hard disk. Check the disk list first, because disk 0 is not always the drive you mean once a USB stick is attached.
- clean removes every partition and every file on that disk. Nothing survives this step.
- create partition primary makes a single primary partition across the whole disk.
- format fs=ntfs quick formats that partition as NTFS in seconds rather than hours.
Run those commands only on a machine whose contents you are happy to lose. A wrong disk number destroys the wrong drive, and DiskPart asks for no confirmation.
Running Setup from the i386 Folder
With the disk prepared, launch the installer directly. PowerISO’s tutorial gives the exact command, assuming the USB drive is lettered E and the target partition is C.
E:\i386\winnt32.exe /syspart:C: /tempdrive:C: /makelocalsource
Each switch does one job. The /syspart switch tells setup which partition receives the boot files, /tempdrive puts the temporary installation files on that same partition, and /makelocalsource copies the installation files to the hard disk so the finished system no longer depends on the stick. Adjust the letters if yours differ.
Drive letters shift depending on how many disks are attached, so confirm them in the DiskPart output before typing anything. Leave the USB stick in place until setup finishes copying, since pulling it early stops the install cold.
If the USB Drive Still Does Not Boot
Work through three causes in order: the firmware never offered the drive, the firmware offered it but setup died, or the hardware is simply too new for XP. Each has a different fix, and the third has none.
The Drive Never Shows in the Boot Menu
Start with the port. Move the stick to a USB 2.0 port, press F12 again, and see whether the entry appears. Next, confirm that USB legacy support is enabled and that CSM or legacy boot mode is switched on, since a UEFI only configuration hides MBR drives entirely. Rebuilding the drive as NTFS under MBR partition only is the last check, because a FAT32 or GPT stick can look perfectly healthy in Windows and still be invisible to the boot menu.
Setup Starts but Fails Partway
Blue screens or hangs early in text mode usually point at the storage controller. Switch the internal hard disk mode from RAID to AHCI in firmware and try again. Should the machine freeze once setup begins loading drivers, the USB controller is the next suspect, so set it to EHCI, disable XHCI and reboot.
A drive built from a 64-bit XP image can also fail at this stage. Rebuilding from a 32-bit ISO removes that variable, and it costs nothing except the time to write the stick again.
A Checklist to Run Before Rebuilding
Seven checks, in this order, catch nearly every failure before you reach for a different tool.
- Port: stick moved to a USB 2.0 port, not a USB 3.0 one.
- Legacy USB: USB legacy support enabled in firmware.
- Boot mode: CSM or legacy boot switched on, UEFI only mode off.
- Disk mode: internal hard disk set to AHCI rather than RAID.
- USB controller: EHCI selected, XHCI disabled.
- Drive layout: as specified above.
- Image: as specified above.
When the Machine Is Too New for XP
Some systems will not boot an XP USB drive under any settings. Techgage found that many modern machines fail to recognize or boot the XP drive at all, simply because the BIOS lacks the support XP needs. No tool fixes a missing firmware feature.
Two options remain in that situation. Run XP inside a virtual machine on the modern hardware, which sidesteps the firmware and driver problems entirely, or find older hardware with a plain legacy BIOS. Neither is the answer most people want, though the virtual machine route is usually far quicker.
Frequently Asked Questions
Does a Windows XP USB Installer Work on a UEFI PC?
Sometimes, and only with the compatibility support module turned on. A UEFI machine has to run CSM or legacy boot mode, use an MBR drive, and have USB legacy support enabled before an XP installer will load. Even then, many recent systems refuse, because their firmware no longer carries the INT 13h services XP expects.
How Big Does the USB Drive Need to Be?
One gigabyte is the minimum capacity quoted across the guides, and any modern stick clears that easily. For booting Windows XP Embedded, Microsoft’s archived performance guidance recommends certified hi-speed USB 2.0 media with a write speed of at least 9 MB per second, plus SLC NAND flash for steadier performance. USB 1.1 media is explicitly not supported.
Can I Use a 64-bit Windows XP ISO?
Better not to. Testing reported by Techgage found 32-bit XP images work reliably while 64-bit images had only limited success, and the tools involved are built around the 32-bit i386 layout. If a 32-bit ISO is available, use it and avoid the gamble.
Do I Have to Format the Drive as NTFS?
Yes for the Rufus route, which specifically calls for NTFS rather than the FAT32 default. NTFS paired with an MBR partition scheme is what keeps the drive bootable on BIOS systems and on UEFI firmware running in compatibility mode. Other tools format the stick themselves, but they land on the same combination.
Can I Boot the XP Installer from a USB 3.0 Port?
No. USB 3.0 ports are not supported for this job, so move the stick to a USB 2.0 port before booting. Where a machine has nothing but USB 3.0 ports, setting the controller to EHCI in firmware is the only lever available, and it does not always work.
Building the drive is the quick part of this job, and Rufus with MBR partition only plus NTFS gets it done in a few minutes. Firmware is where the time goes, so check USB legacy support, CSM, AHCI and EHCI before blaming the stick. Keep a 32-bit ISO, a USB 2.0 port and a backup of the target disk within reach, and the install either works or tells you quickly that the hardware is too new.
References
- Creating Bootable Windows XP, 7, 8 and 10 USB Flash Drive Installers, Techgage
- How to Make a WinXP Bootable USB Drive, PowerISO
- How to Put Windows XP on a USB Flash Drive, Lance’s Tech Blog
- How Can You Put Windows XP On a USB Drive, Wondershare Recoverit
- Requirements for USB Boot, Microsoft Learn
Sources read in September 2026.